Friday, March 31, 2023

Is Chrome Developer Tool a Future For Test Automation?

 Devtools (Chrome Developer Tool)  is a powerful set of tools that helps web developers to build better applications.

In this blog, we will learn about Recorder Panel.

First, you need to open Devtools. To do this first you need to Press F12 or Rights Click – Inspect.

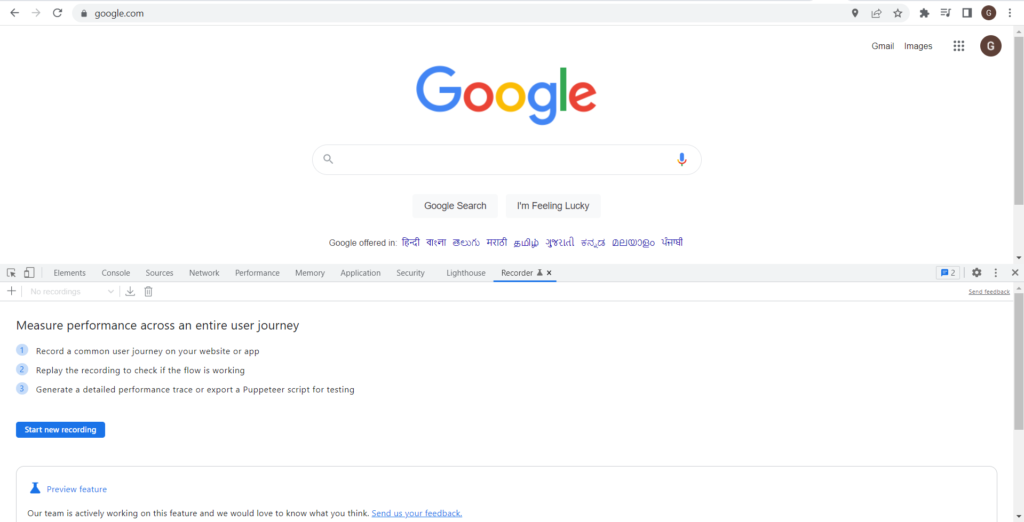
Now you can click on Recorder. If you are not able to see recorder options in Devtools, then click on three dots from Devtools – More Tools – Recorder. Below is the screenshot of what this chrome recorder looks like.

Table of Contents

What Exactly Does This Recorder Panel Does?

This recorder is used for multi-purposes:-

    1. Record all actions that the user performs
    2. You can download this recording
    3. You can replay this recording
    4. You can inject certain steps within the recording of how exactly it will be if we make changes
    5. You can measure the performance of each step
    6. You can export the puppeteer (node JS) script

Let’s See How The Google Chrome Recorder Works?

  1. Click On the Start New Recording button and enter the recording name Ex – TestScript
  2. Click On the Start New Recording Red Circle button
  3. Perform a Few Actions on the website like Opening the URL, Entering Data, and clicking any button
  4. Once Actions are performed, then click on the End Recording button. This will save our recorded action in “Test Script”
  5. Now you can export your recorded script. It will be in NodeJS and then you can embed it into any application.
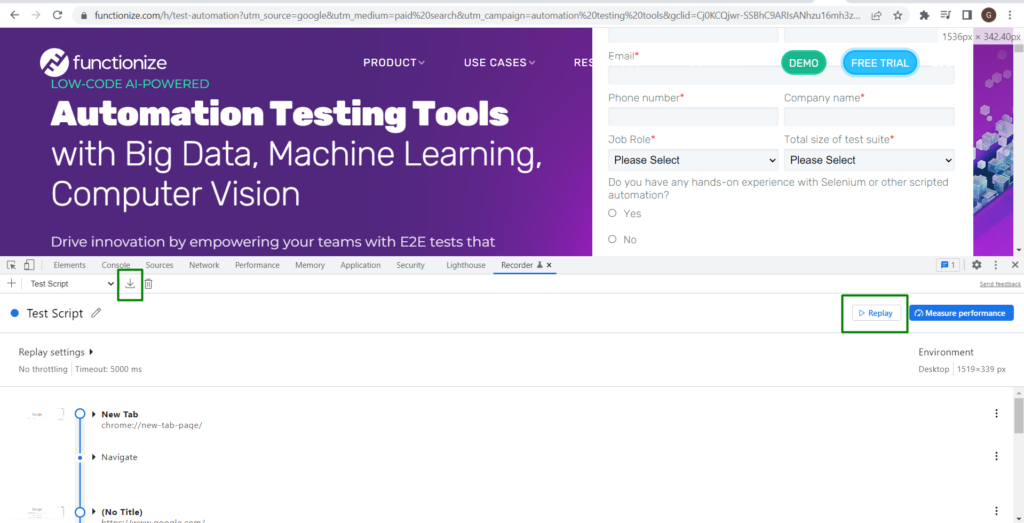
  6. You can replay the recording to see all your recorded actions

Machine Learning

While replaying the test script, you can change locators for any step, you can add assertions or can add a timeout, etc.

How to Change Selector in Your Recorded Script?

  1. Click On the Arrow icon in your test script for that action
  2. Then click on the element on which you want to perform this action
  3. The selector will automatically get filled in your test script for that element

How do Add Assertions in Recorded Test Script?

Suppose we need to verify that the count displayed on the page should be 6.

Follow the below steps For Assertion:

  • # Click on Three dots and add that step where you need to perform the assertion
* type: wait for element
* selector: {You can add locator on your own}
* operator: == {Click on Add Operator button}
* count: 6 {Click on Add Count Button}


The above Step will help you to achieve assertion in your test script

Read Also:- Tutorial On Cucumber Automation Tool

Common Selector/Locators Used:
  1. data-testid
  2. data-test
  3. data-qa
  4. data-cy
  5. data-test-id
  6. data-qa-id
  7. data-testing

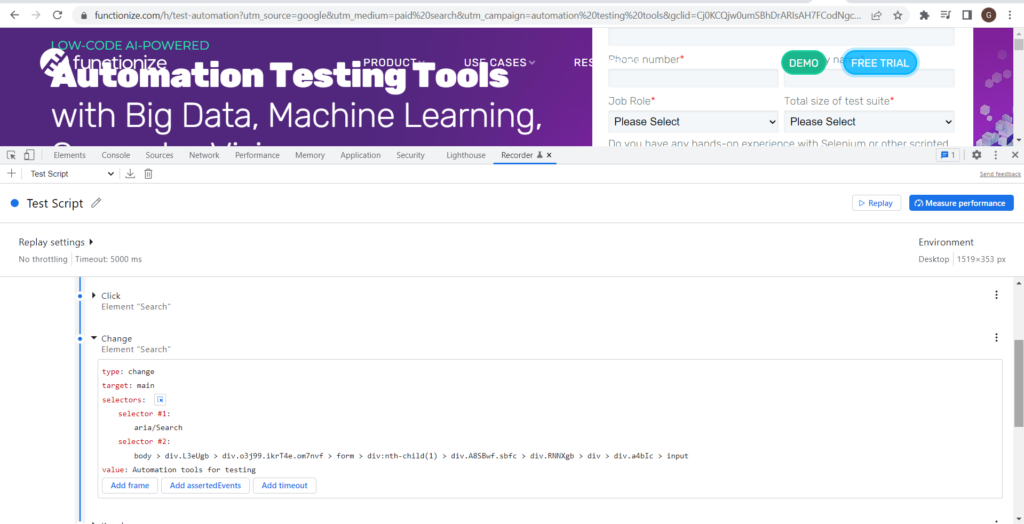
In Below Screenshot you can see we have a selector for the search element and there we are entering some value

Selector Locators

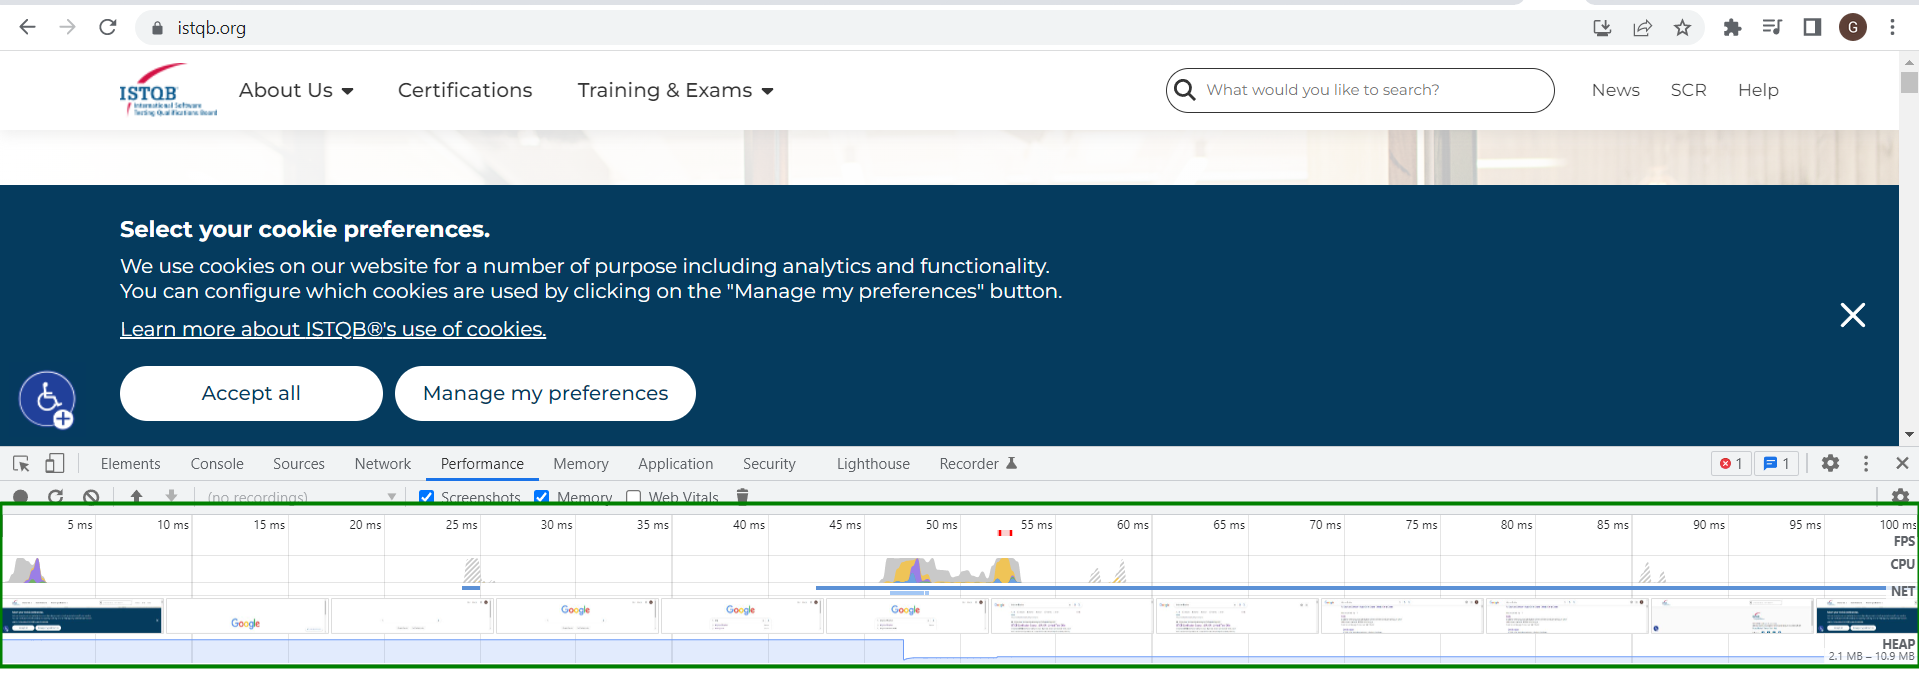
The best part is we can measure the performance of my entire recording. Click On the Measure Performance button and then see what’s the outcome

Once we click on the Performance measure button, then it will replay your recorded script. Once script execution is done, then it will redirect us to the Performance tab in Devtools

Every Action has been recorded for his performance. Like how much it is taking for the CPU, where it is taking more time etc.

Puppeteer file Now we will record some actions and then download the Puppeteer file for those recorded actions.

Read Also:- Read & Write Data Using Apache POI – JAVA

Actions Performed in Script
  1. Navigate To google.com
  2. Click on Search Field
  3. Enter “ISTQB certification”
  4. Press Enter Button
  5. Key Up to go to ISTQB Link
  6. Click On the ISTQB link
  7. It redirects to Page – https://www.istqb.org

Recorded all these actions through Chrome Recorder. Now Click on Export Icon From Recorded Tab. It will export the puppeteer script

You can find the puppeteer script in the link below. The link is public so you can download it easily

https://drive.google.com/file/d/1FXJNE_x14U6Q9IzeTGAMMraizEDPJAF_/view?usp=sharing

How To Run Puppeteer Script for CLI?

Puppeteer is a Node JS library maintained by Google and used for web scraping
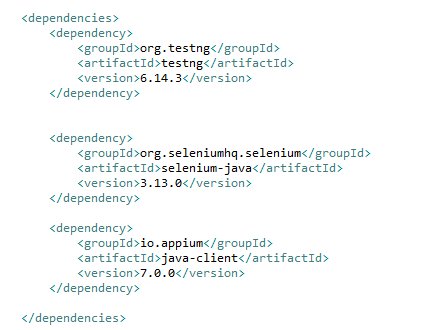
Prerequisites are:

  1. Node JS
  2. npm

Now Install the Puppeteer library in your project. Run this command in terminal

npm install puppeteer

Now run your test from terminal

node {{test file name}}

In our case the name of the file is TestScript.js. So, we need to run the command

node TestScript.js

The test will be executed and by default puppeteer will run the script in headless mode

If we want to see Script execution on User Interface, then you need to edit the JS script

In the Sample TestScript.JS file, you can see Line No 4:

const browser = await puppeteer.launch();

Just here we need to add an argument here. Change this line to:

const browser = await puppeteer.launch({headless: false});

Save this file and run it again to see script execution on User Interface

FAQs

  • What is Recorder in chrome developer tools?

You can record the checkout sequence once and measure it repeatedly using the Recorder panel. The user flow will be replayed when you click the Measure performance button, and the Performance panel’s performance trace will then be displayed. Learn how to use the Performance panel to evaluate the runtime performance of your page.

  • How do I use chrome as a Recorder?

Select the dev tools recorder panel.

Launch the chrome developer tools recorder. Select Recorder from the More options > More tools menu. You can also access the chrome dev tools recorder panel via the Command Menu.

  • Does chrome have a Recorder?

Chrome addon for capturing video from the screen or the camera (desktop, specific application window, or Chrome tab). Free to use No registration needed No watermarks Unlimited video recording New features include auto-saving videos and recovering recordings after crashes.

  • Can puppeteers record videos?

A puppeteer opens the dev tools plugin that chrome action recorder video frame-by-frame using the native Chrome dev tool interface. Additionally allows the choice to follow pages that the current page object opens.

  • What is the disadvantage of a puppeteer?

One tool may not be the answer for all problems because the complexity and automation environment are evolving daily. puppeteer recorder has various restrictions, such as the fact that it only supports Chrome. Puppeteer for Firefox is still under development.


Original Source:- Click Here

Wednesday, March 29, 2023

Introduction to WinAppDriver – Free Test Automation Tool


What is WinAppDriver Tool?

Microsoft Windows Application Driver (called WinAppDriver) is a service to support Windows Application tools similar to Selenium.

It is supported on machines running Windows 10 operating system (Home and Pro) and Windows Server 2016, and it supports all Windows applications based on WinForms (Windows Forms), WPF (Windows Presentation Foundation), UWP (Universal Windows Platform), and the classic Win32.

WinAppDriver enables Appium by using its API calls which were added in Windows 10 to test any windows based application.

Why WinAppDriver?

– WinAppDriver is such an awesome tool and the following feature uses this tool leader in its field of automation for desktop applications.

– It is a free tool

– It develops by Microsoft

– A most important feature it uses the WebDriver protocol

It means as in the WebDriver environment (Selenium), same with WinAppDriver’s environment we will also identify elements with findElement, we will also work with Page Object and we will also use the same methods such as: clear, sendKeys, click, etc like web/mobile automation.

Configuring the WinAppDriver Environment

Installation/Prerequisites

  1. Should have any Windows 10 PC.
  2. Java 8 and above
  3. Any IDE Eclipse, Visual Studio 2015+
  4. You should have Admin rights on your PC
  5. Enable Developer Mode
  6. Download and install Windows-10-SDK https://developer.microsoft.com/en-us/windows/downloads/windows-10-sdk
  7. Download and Install the latest Windows Application Driver can be found: https://github.com/Microsoft/WinAppDriver/releases/ 

After downloading, Navigate to the folder location C:\Program Files (x86)\Windows Application Driver and run “WinAppDriver.exe”. This is your prerequisite before running the WinAppDriver code. 

Inspecting Elements

There are some tools that actually help and support inspecting object properties in windows applications. Go to Inspect.exe as WinAppDriver GitHub recommends Microsoft Native tool.

Navigate to the Windows SDK folder –

C:\Program Files (x86)\Windows Kits\10\bin\10.0.17134.0\x64

Open Inspect.exe

one example opened a calculator and inspect the element, please refer to the below snapshot

WinAPpDriver - Free Test Automation Tool

POM Dependencies

Windows Application Driver free test automation service tool

Recommended to Read- Gitlab Automated Testing Tool

Automation Script

Automation Script UI test automation service

With WinAppDriver we can use a variety of programming languages. In this example, I am using Java with Testing. Below is the code I use to launch the session to the Calculator application:

Once we reach the step of initiating the driver, we need to turn to the local address (in our example) with port 4723, which is the default port of the Appium Server. Now, once our driver has been initiated, we can start working with it in order to execute methods from the familiar WebDriver protocol:

WebDriver protocol


Conclusion:

WinAppDriver supports a number of standard Appium Capabilities. It is easy to use and a possible option for other existing Paid tools in the market which helps to implement and integrate one platform and one solution for your automation projects. This tool will also help when we have to perform Windows Automation. 

Leverage the expertise of our QA testing Consultants to ramp up your QA process.


Original Source:- https://www.devstringx.com/introduction-to-winappdriver-free-test-automation-tool

Monday, March 27, 2023

How to Write Unit Test Case on Slim 3 to Test API | Devstringx


Prerequisites:

  • PHP 7.3
  • Visual Studio Code

1) Install slim via composer

//run this command on terminal composer require slim/slim:”3.*”

install slim via composer

2) Install PHPUnit

//run this command on terminal

composer require-dev PHPUnit/PHPUnit ^7

phpUnit

Now, PHPUnit successfully installs you can see it in the demo/composer.json file and in the vendor folder.

3) Create a Demo/phpunit.xml Configuration File

Now we have to create a demo/phpunit.xml configuration file which use to configure the PHPUnit

phpunit.xml

4) Create a Demo/Tests Folder

Now we have to create our demo/tests folder in our project.

demo/tests

5) Create the Demo/src Folder Inside the SRC Folder

Now create the demo/src folder inside the src folder you have to create a file name routes.php in which you will write your API.

routes.php

In the routes.php file, I have created an API for the addition of two numbers.

6) Set Up the Autoload to Autoload

Now we have to set up the autoload to autoload everything from the tests directory in the composer.json file.

composer dump-autoload

Write “autoload-dev”: { “psr-4”: { “Tests\\”: “tests/” } } this in your composer.json file And run command-

composer dump-autoload –o

7) Create a Functional Folder

Now coming to the demo/tests folder inside the tests folder we have to create a Functional folder inside that I have created a BaseTestCase class which is extended from TestCase class.

App function

Inside BaseTestCase class, we have created the run app function passing the $requesMethod (POST, GET), $requestUri(API name), and $requestData(array of data), inside this function I have created mock environment objects with custom information. Mock Environment objects are only useful when writing unit tests.after that I have setting up the $request = Request::createFromEnvironment($environment) object. Now adding the requested data if exist. now setting up the response object. create an object $app = new App();

After that process, the application $response = $app->process($request, $response) And returns the response.

8) Create the File for Testing

Now create the file for testing out API demo/tests/Functional/routesApiTest

routesApiTest

In this we have created a class routesApiTest extended from BaseTestCase class If you are writing a test case then you always have to write test as a prefix of the function like testaddNum or you can write as I wrote in my case /** * @test */.now create a function addendum inside this function I have called runApp method in which I am passing the 3 parameters first-method which is post,second-API name,third-data array. Now I am using assertEquals methods in the first parameter is what I expect and the second parameter $response->getBody() is what it returns.

9) Run the Command In Terminal

Now run the command in terminal

./vendor/bin/PHPUnit tests

FAQs
  • What is a slim test?

SLIM Test Method. Fit’s substitute is Slim (Simple List Invocation Method). Slim maintains all of that activity active in FitNesse rather than doing all of the HTML processing, comparisons, and colorization in the System Under Test (SUT).

  • What is slim3?

slim framework 3 is a PHP micro-framework that makes it simple yet effective to create APIs and online apps. slim 3 routes is fundamentally a dispatcher that receives an HTTP request, calls the necessary callback procedure, and then sends back an HTTP response. I’m done now.

  • What is the purpose of unit Testing?

Unit testing’s primary goal is to separate written code for testing to see if it functions as intended. Unit testing is a crucial stage in the development process because, when done properly, it can aid in finding early code issues that could be more challenging to identify in subsequent testing phases.

  • How do I download slim?

slim test Installation. Installing Composer along with Slim is advised. To run the bash command, go to the root directory of your project and type the command given below. With this command, the Slim Framework and its external dependencies are downloaded into the vendor/ directory of your project.

  • Is Slim a good framework?

SOLID concepts, design patterns, security principles, and dependency injection are all compatible with the slim framework. Compared to full-stack frameworks like Laravel or Symfony, slim testing is simpler to learn.

If you are interested in even more software testing-related articles and information from us here at Devstringx, then we have a lot to choose from for you.


Original Source:- Click Here

Is Chrome Developer Tool a Future For Test Automation?

  Devtools (Chrome Developer Tool)  is a powerful set of tools that helps web developers to build better applications. In this blog, we will...